Showing posts with label baking. Show all posts

Thursday, October 20, 2011

Apples...Mountains of Apples...

We haven't had dinner at the dining room table (or school for that matter) since last Friday.  See, last Saturday I went to the orchard and picked up 125 pounds of apples...a little extreme you may say, but a $15/bushel for seconds, I couldn't pass it up (and 25 pounds or so are for a friend so really 100 pounds of apples for 4 people isn't really all that ridiculous is it?)  This year the going rate for apples is $35-$40 per bushel...the lower end is pick your own...yikes!  I was hoping to make apple products for a year out of this much and now it seems like it may not be enough.


So on Sunday I began canning applesauce much like I did last year.  This year I got 18 quarts/bushel.  I also decided to make apple pie filling since my husband enjoys a flat topped apple pie (when you cook with raw apples it mounds the top crust and then the apples cook down and you are left with a large air pocket...when the apples are pre-cooked, this doesn't happen and the husband is happier.)
So since I posted last year on apple sauce and how I do that, this year I will attempt to show apple pie filling in all it's glory.

I have been looking at several recipes on line as well as in various books and have kind of agglomerated these into my own version using spices we like (love cinnamon!) and leaving out/ reducing quantities of what we don't (we don't use much ginger or nutmeg as the smell of the spices give me a bit of a headache.) Spices don't effect the canning time, but everything else does so I went with the longest processing time.  Since apples are high acid and I'm also canning using sugar (organic raw evaporated cane juice to be more specific...not grocery store white sugar, which would work equally as well, but I like the slight molasses flavor that this gives...sucant works as well if you  have that.)  So here it goes.

Homemade Apple Pie Filling
Makes about 6 quarts 
12 pounds of  apples (1/4th of a bushel)
Peeled, cored, and then sliced
4 cups water
1 1/2 cups sugar
1 Tbs lemon juice
2 Tbs cinnamon
1 tsp each ginger, nutmeg, allspice

Mix the water, sugar, lemon juice, and spices in a large pot.  Put the apples in and coat with the sugar mixture (if you want to be especially tricky, put the apples in the pot and then pour the mixture from another container.)  Heat over medium and carefully (as not to break up the apple slices) stir the mixture.  Once the mixture starts to get hot, cook for about 10 minutes until the apples are firm, but starting to cook.
In the meantime sterilize your quart jars and prepare the lids.  Ladle the apples into the quart jars, pour the syrup over the apples adjust the head space to 1/2 inch, adjust the lids and process in a water bath for 25 minutes.  

Now that you have the jars of apple filling what do you do with them?

  • Well first you can make pie...just like you would otherwise with raw apples, but the cooking time will be slightly reduced.
  • You can make apple crisp...just pour the contents of a jar into the baking dish, add your favorite topping and bake.
  • Warm up and enjoy over ice cream (or just eat as is warmed up...maybe sprinkled with a little granola for a quick pseudo crisp)
  • Make mini pies in muffin pans for those school lunch treats (or for breakfast...much healthier than poptarts.)
  • But first, before anything, admire them on your shelf and know how wonderful it is to have all your apples preserved in one way or another for the coming year.

And for cost analysis...much like the applesauce, it is much cheaper to make your own pie...
At the local grocery store a (conventional) pie goes for about $8.99.  
One quart of apples costs $0.62 ($15/bushel divided by .25 divided by 6)
Sugar 3/4 lb is approximately 1.5 cups at 1.25/lb it is $0.94/6 is $0.16
Lemon juice and spices call it $1.00 for the batch $0.17  
So in total it is less than a dollar per jar ($0.95)
To make a pie crust  it is about $0.50
So for about $1.50 I can make a pie.
That is if I want to...
I may just eat some of it straight up.

(Using "natural" apples, and all else organic.
Also, by buying from the farmer, I help keep the money local.)


I'll be submitting this to Punk Domestics...cause it's fun.

Friday, August 12, 2011

Scrumptious Saturday...the first pie

Pumpkin pie...a fall treat.
Well, not so much.
We harvested our first volunteered squash (Long Island Cheese) last night.
He weighed 10 lbs 5 oz.
(Did I mention it was also my dear husband and my anniversary Tuesday and that's why I needed something desserty?)
He was promptly chopped into eight pieces, guts removed and fed to chickens, and boiled.
After cooling, the squash pulp was removed and put back into the pot.
After simmering for about an hour, the liquidy, faintly sweet and pumpkiny, pulp had condensed into a thin paste.  This was then blended using a stick blender to make the fiber smooth and creamy.
Two cups were turned into pumpkin(ish) pie.
Now, I always had an issue with serving sizes for pie.
I also have a muffin tin.
I bet you can see where this is going.
I have fond memories of my mom making personal pies for school lunches once in a great while.
It was such a treat to find a little pie all wrapped up in you lunch box.
So this Scrumptious Saturday, I will leave for you as a method rather than a recipe.
Personal Pie
Make your favorite pie crust recipe for one pie (one or two crust depending on what kind of pie)
Grease your muffin tin that you will be using.
Roll and cut your crust to fit your muffin tin.
Put filling in.
(if two crust put top crust on.)
Bake as you would for a regular pie...it will be deeper so it will take almost as long as a regular pie.
Store as you would that type of pie.
(If it lasts that long.)
Works well with pudding pies and pumpkin.

Saturday, August 6, 2011

Scrumptious Saturday...gluten free 3 ingredient peanut butter cookies...

There's a story behind these ones...
It was one of those days...where dinner was going to be "interesting."
That's code for something that may not be enjoyed.
So I decided to balance it out with one of my husband's favorites.
He loves peanut butter cookies...but I didn't have the time or patience to put together the traditional recipe.
One of my clients had a nanny that thought it was social hour, not therapy time.
She would not stop going on about gluten free peanut butter cookies 
(that Troy Polamalu's next door neighbor loves..."I hear at a neighborhood picnic Troy said he loves them."
I guess they are on a first name basis now.)
So here they are Troy Polamalu's favorite Gluten Free Peanut Butter Cookie recipe.

Gluten Free Peanut Butter Cookies
1 cup peanut butter
1 cup sugar
1 egg
(optional...chocolate chips to taste.)

Mix together, place on a cookie sheet, cook at 350 for about 5-8 minutes. 
(You can also do the traditional roll in a ball, roll in sugar, and put fork marks in them...
again a time and patience issue that day.)
That's it...enjoy...

Thursday, August 4, 2011

Back in the saddle again...

While we've been "homeschooling" through the summer as planned, it hasn't been our traditional type lessons.  We have spent time in the garden, taking care of chickens and charting production of both.  
We have been exploring the world around us and thinking about geography in relation to where we are and where we are going.  
We have been thinking in a way about multiplication and division, without using those terms.  
And as usual we have been baking, cooking, and talking about our friends the "yeastie beasties" that make bread soft and fluffy.  
I am tempted to create a child's bread baking book in a story format..."Once upon a time in bread land princess wheat was kidnapped by the yeastie beasties..."  it is a story told too often in our home.  
After scouring the internet, I finally found the cure for the crankiest sewing machine on earth...and cured it from it's issues (which two sewing machine fixers couldn't fix.)  
C. is very interested in creating a princess costume for Halloween (she's been talking about Halloween since November when the candy ran out.)  
"Home Ec" may be her idea of a good time.
But now it is the time when we start the formal lessons...
It takes a while to get back in that saddle again.
W. is really looking forward to a history book that I got out of the library.
It is so far over over his head, but that's okay...I know how to paraphrase.
We are continuing on in Saxon Math and Phonics Level 1.
For science we are exploring the world around us.
And reading...lots of it.
I read a chapter of On the Shores of Plum Creek...
W. reads about 10 pages of Hop on Pop...
or a Biscuit book...
or a reader from his Phonics program...
and for math, reading and science all in one...
there's always reading the cookbook.

Tuesday, August 2, 2011

bubble bubble buzz....

Despite my total absence from this space for the past few months...things have indeed continued on here on the Country homestead.  There is plenty of updating and filling in to do.  Reflections on summer.  Changes in the landscape and on the animal front.  All that.  But for today, late as it is, I can tell you that amidst a house full of children, lawn mowing and thunderstorms, and in the face of an oven repair that was two months in the waiting...I was kitchen bound! 
Things have been bubbling, fizzing, buzzing and rising all over the place.  City sister, during her recent (and super fantastic) visit, left me with some sourdough starter that actually originated from another lovely homesteader so many miles away.  By a stroke of miracle I did not kill it.  It is living on the top shelf of my fridge.

I kicked off 5 loaves of oatmeal bread today (oven repaired just in time...phew).  A double batch of cookies.  Rhubarb muffins for the freezer.  Soaked our dry beans for crock pot baked beans.  Two quarts of yogurt culturing away in the cooler. 


One loaf taken by force with bread knife and butter...


Our own Jacob's Cattle beans soaking on the counter.

How we do our yogurt.  Cultured milk snuggled in with hot water bottles in a cooler for 8 hours.

A little of the good fermented stuff to close out a long day in the kitchen.

One of those days where it all comes together.  Busy kids, food put away for the week, kitchen cleaned.  And would you belive it...a blog post to boot!  Feels good to be back.
More details on the buzzing in a couple days.....

Thursday, July 28, 2011

Cultured Buttermilk

I always felt as though buttermilk was one of THOSE refrigerator items...
One of those things I don't really use except when making pancakes or something fancy...
One of those things I could just sour milk for and not have the added expense of buying something just for a few items...after all, I do so love multipurpose.
But alas, W. started having some milk issues, so I decided to experiment with cultured buttermilk since yogurt didn't seem to bother him...and lo and behold...it was fine!
So...I still had the "I don't want to buy buttermilk just for baking" issue...
So I decided to just find a way to make my own...
Easier than yogurt...let me tell you I wish I knew about this before...
Cultured buttermilk

Buy a container of buttermilk with live cultures (got mine at Trader Joe)
Pour one cup of it into a clean quart jar
Fill with milk (whatever type you like...doesn't matter if it is ultra pasteurized, raw, your monkey's uncle etc.)
Shake
Let sit at room temperature for 12-36 hours
Refrigerate 
Use
When you are down to one cup in the bottom of the jar, pour into a new jar and repeat the process.
That simple
We've been going through about a quart a week for baking, pancakes, and buttermilk sourdough waffles.
It seems to add a richness to items.
I use a touch less leavening too (or not.)
Baked items seem to stay moist longer as well...
(as always...this is what I do, use caution in the kitchen and always use approved methods as bacteria and culturing can be harmful if not done it the right way...)

Saturday, July 2, 2011

Scrumptious Saturday...I'm a nut job

So I have always wondered where almond milk came from.
No udders.
No creaminess.
So I happened upon Earth Mama's  nut milk recipe...and my curiosity was finally satiated for this query.
So here it goes.
Put one cup nuts into a jar and cover with water.

(I put one cup of almonds in a pint jar and filled 3/4th of the way with water.)
Soak overnight.

(I soaked almost 24 hrs.)
Drain off water.
(Be amazed about how large your nuts get.)
Place in a blender with 4 cups of fresh water and blend until smooth.
(Or place nuts and 1 cup of water in a container and use a stick blender to pulverize...then place a cloth over a strainer and jar and pour the slurry into the cloth...then put the nuts back in the container with more water and repeat until all 4 cups of water have been filtered through the nuts.)
Strain nuts through a cloth and squeeze like no tomorrow.
You will have about a quart of nut milk and about a cup of nut flour...keep the nut flour for

Grain Free Brownies
Also known as freekin' good brownies.
4 eggs
2 cups sugar
1 tsp vanilla
1 cup plus 4 TBS fat (I used a combo of butter and canola oil) Melted
1/2 cup nut flour
3/4 cup cocoa
mix eggs and sugar until eggs become fluffy...add cocoa, fat, and vanilla...mix in nut flour... Grease the bottom of a 9x13 pan (or a smaller one for thicker brownies...and cook longer) bake at 350 for about 20 minutes...enjoy!
Somehow these brownies came out really dense and fuggy, but fluffy at the same time.  When dealing with the leftover almond flour, I was amazed how fluffy it was (compared to regular flour) and it seemed to pass this trait on to the brownies.  
The recipe was based on the Silver Palate cook book, but modifications were made to change the flour, fat, and chocolate methods (I never have unsweetened chocolate by the ounce on hand.)
So enjoy and tell me what you think.

Sorry no picture of the  brownies...they seem to be in the belly of my family almost instantly!

Tuesday, April 19, 2011

This and that...

You may or not know this, but Country Sister and I have brothers as well...in fact, sometimes since this is kind of a girl thing, I contemplate asking our sister-in-law to write here and there as well...
Well, I was late posting today and did not post on Saturday due to a visit from my brother and his family...While it was a short visit, it was a lot of fun.  We went to the zoo and to the Children's Museum...
There was lots of play and lots of cranky, sleep deprived children.  
So we spent this morning getting caught up on errands, chores, laundry, and sleep.  
We also made cookies.
My dear little C. decided that she wanted to make cookies with her mother, and I was okay with this because we have lots of little odds and ends around to make them with.  And since things were not scrumptious for you on Saturday...I will make today scrumptious...
Jumbled Cookies
3/4 cup butter
1 1/4 cup sugar
1 Tbs molasses
2 eggs (or 1 double yolker as we used today)
1 tsp vanilla
1 tsp baking soda
1 tsp salt
1 cup flour
1 1/4 cup oats
2 cups fun stuff (I used malted barley chocolate chips, pecans, and raisins.)
Cream sugar and butter, add molasses, and beat well.  Add the eggs and beat well, then add the vanilla.  Stir in the soda and salt.  Then add the flour and oats.  Mix in the mix-ins, scoop out onto a cookie sheet by the largish tablespoon, then bake for about 8-10 min at 350.

I also have been working on something special, but I cannot show it...it's going to be a gift.  

I am contemplating buying this book...

Does anyone have experience with it?
Is it worth it?
I think I could come up with the perfect sweater that my husband wants for Christmas.
If he wants it then, I better start getting to work...
Which brings me to the new item on our sidebar...
Click on the Eat, Sleep, Knit.
button on the sidebar, and it gives me yardage towards my Yarn Marathon...
(and while you are at it, contemplate their yarn that is at quite a reasonable price.)
I may not run them in real life, but I'd like to be able to knit that much in a year...help me get there!

PLEASE...Pretty Please...with cookies on top!

Saturday, March 19, 2011

Scrumptious Saturday...a pie for my guy

My husband starts a new job on Monday...Friday was his last (official) day at his old job.
So technically he is unemployed this weekend.
So I made pie.
Somehow it seems fitting.
He wanted cherry pie.
I didn't have enough in the freezer.
So this is what he gets.

Mixed Berry Pie
One recipe double pie crust
about 6 cups blackberries, blueberries, and cherries
2 TBS cornstarch
1/4 cup flour
3/4 cup sugar
Mix the berries, flour, cornstarch, and sugar in a bowl.
Roll out the crust and place in a greased pie pan.
Put the berry filling in.
Put the top crust on in any manner you see fit.
(I did lattice, but I saw a lovely one done once with cookie cutters and seasonal shapes.)
Brush top crust with milk and then sprinkle with sugar.
Bake at 400 for 20 minutes.
Bake at 350 for about an hour.
You may want to cover the pie with tinfoil once it turns the correct color brown.
Enjoy it.

Tuesday, February 22, 2011

What I've been doing while MIA...

Well, after my last post, things kept happening...
The drain pipe for our tub burst leaving our kitchen and basement flooded.
In its wake, I ended up throwing out food and parts of the ceiling 
(and at times both in one mushy handful.)
Then I called my mom.
"At least everyone has their health."
Mom why did you have to jinx us.
W. got sick the very next day with a fever of 103.6

Well life goes on.

We've been...
Making honey wheat bagels.  
The recipe I used I decided was too sweet.  
Next time I won't use so much honey.
Maybe when I get the recipe perfected, I'll post on that.


Making popcorn.  A true comfort food.
All of our paper bags were destroyed in the flood, 
so I made in in a pot the old fashioned way.
I've always been afraid of this method ever since my cousins got really bad burns from hot oil while making popcorn this way many years ago.

Studying plants.  This is our lavender that we planted a few days ago in coconut coir.  
The onions are starting to poke their little leaves up as well.  We also started sweet potatoes, but we'll see what happens there...it is a big experiment for us this year to attempt those.

I am thankful that we have so many opportunities.  
That our pipe burst didn't destroy too much.  
That we did not truly have a flood such as many have to endure.
Things could be much worse.

Monday, February 14, 2011

Chocolate chip cookies...without an oven...

Those who have been reading know I love my oven.
I use it daily.
It is a trusted friend.
It runs 30 degrees hot.
I have had it's innards replaced already one time.
In the five years that we have been friends, I have never cleaned it, until now.
Yes, I did a dreaded task of cleaning the oven.
Days of preparation, soaking, and other ways to remove five years of baked on crud.
I have had this opportunity due to my oven having a fit and deciding not to work, thus I have been using it's upstairs neighbor, the stove top.
Chocolate chip cookies do not do well on the stove top.
Thus, I have decided to revamp the classic chocolate chip cookie to a rawish (not quite if you use melted chocolate, or don't make your own "chocolate" stuff) vegan style...
oh, did I mention I have also decided to truffle it...after all, it is the feast day of St. Valentine.  
My husband always asks me to make him chocolate chip cookie dough (notice...not cookies)
So here is my mad attempt to make his dreams come true.
(note, this is a first attempt at this recipe...
they taste pretty good so far, 
but any helpful suggestions are welcome)


Raw Chocolate Chip Cookies
1c. coconut oil
3/4 c. brown sugar
3/4 c. white sugar
(cream together)
1/4 tsp baking soda
1 tsp salt
(mix in)
1/3 c. almond milk (or soy)
1 tsp. vanilla
(stir in)
2.5 c. flour
(stir in)
1c. small pieces of chocolate (mini chips, chopped chocolate etc)
or you could use any other cookie mix in that you like.
or if you decide to truffle it, you may not want to add any at all.

Roll into small balls and place on a cookie sheet in the freezer for about 1 hour. Serve as is...or
Truffles
Melt a bit of chocolate with a touch of coconut oil.  Dip the balls into the chocolate mix.
Place back in the freezer to help the chocolate set.  
Savor...best with your loved ones.
P.S. My dear husband if you see this please be surprised when you come home,
the kids really want to give you a big surprise gift.

Thursday, February 3, 2011

A brewing storm.

It was an eerie morning.  The sun came out, bright and warm.  
Something didn't feel quite right about it.  
I made sure I took care of the chickens early just in case.
We had breakfast and went to playgroup.
The instant I left the warm school building, I knew that that uneasy feeling was.
The calm before the storm.
I have always been sensitive to barometric pressure.
The instant it starts to drop, I develop a migraine.
And there it was.
Leaving the building, the wind started to kick up and large clouds began to float by.
In the 3 minutes it took to get home, the wind started blowing bitterly cold air.
The large white clouds turned dark and foreboding.
The snow started.
Quickly, plans changed.

We decided to stay in and make cinnamon buns.
A rare treat.
Not an "always food." 


For Christmas W. got a box of wooden brain teasers and games.
He may not know it, but he's playing an addition game.
I love how every moment is teachable.
Every moment with my babies is special.

Saturday, January 29, 2011

Scrumptious Saturday: The Sisters' "Heirloom" Baked Beans

New England Baked Beans are a big part of...well...New England.   ETC ETC

It was a plan...
Two sisters craving baked beans....
Two crock pots...
Two recipies....

It shakes out something like this:

Country Sister's  Baked Beans
Step 1.  Acquire Vintage Orange Crock Pot as awesome Dump Find after City Sister acquires the much sought after family heirloom crock pot in a questionably underhanded manner one holiday visit (I'm kidding here of course--but the whole crock pot debaucle has been the source of many laughs so we of course HAVE to keep it going...and make the story more crazy every time)

Fill crock pot about 1/3 to 1/2 full of rinsed drybeans.  I use a combination of Great Northern (bought bulk) and Jacob's Cattle (homegrown)
Add One Medium Onion Coarsely Chopped
Just Cover with Water
Turn Crock on High

Check in an hour or so and again cover with water

When the beans are basically soft through
ADD:
4T Ketchup
1/3 C Brown Sugar
1/4 C Molasses
3 T Dry Mustard
2 Strips Bacon (raw)

Cook on High 2-3 hours
Check for doneness
Salt to taste and turn down to low until you eat or store them for later in the fridge or freezer (yes you can freeze them!)

That Country Sister thinks she's something special because her (not so) beautiful (non heirloom) crockpot came from the dump.  Doesn't she now.

Citysister's crockpot beans.

3 cups dry rinsed great northern beans (purchased...during the last great shopping adventure)
1 onion (chopped)
2 cloves garlic (chopped)
4 slices bacon raw chopped up
1/3 cup Molasses
1/2 cup Brown sugar
1/4 cup ketchup
Water
(I have a sweet tooth...it shows here in the bean recipe.)
Put beans in a bowl with 6 cups water.  Try to fight off the 2 year olds manic cooking impulses to crazily stir the beans into oblivion.  Put bowl of beans in a hidden area to baffle the aforementioned 2 year old.  Let set overnight.  First thing in the morning drain the liquid off the beans and put in the crockpot with all the other ingredients as well as water up to the top of the beans.  Tell husband that the weird smells are not his breakfast.  Set crockpot on low for the rest of the day checking on the water level.  Enjoy.

We sometimes will have as a lunch the next day weenie beanies (our) Grannie's recipe!

4 cups baked beans
4 hot dogs
3 Tbs or so of ketchup and mustard
1/4 cup sauteed onion
Saute the onion.  Add in chopped up hot dogs (even when I was older, Granny insisted on chopping them up...after all you could choke.)  Cook the hot dogs until browned and warmed through.  Add the beans, ketchup and mustard to taste.
Serve with BUTTERED (no margarine!) bread.

Tuesday, January 18, 2011

What you get for the money...

Pittsburgh has long been considered a great place to live...
the cultural events and museums
the low cost of living
family friendly environment
and many other reasons...

I had been reading a series from here over the past week about cutting your budget and frugal grocery shopping while maintaining high quality nutritional food.  I found it pretty interesting reading the comments from people about things they do to reduce the cost of wholesome food...

About once a month my husband and I sit down and take stock of the cupboards and freezer and make a big order (or two...when we forget or run out before the order is picked up) from here.  Usually it totals about $300.  For the most part, this is the bulk of our groceries for the month. We supplement with previous bulk bought items, frozen and canned food from the summer, and during the summer items that we get from our garden.  For meat, we bought a quarter of a cow from here, and supplement from here.

2 # butter (Amish roll butter! yummy)*
6 gallons milk (low heat pasteurized, non homogenized- good for making yogurt)*
10 blue corn tortillas*
2 boxes frozen spinach*
5# potatoes*
5# dried beans*
1 bottle disinfectant cleaner

1 loaf bread (we usually make our own, but it's nice to have a frozen loaf on hand)*
1 box vegetable bullion cubes*

1 case tomato soup*
1 bottle Mexican seasoning*
1# cinnamon*
1 jar salsa*
25# rice*
1 gallon honey
25# unbleached flour*
5# raisins*
1# cocoa*
1# oregano*
1# Italian seasoning*
4 oz. vanilla
8 oz. artichoke fettuccine*

3# apples*
1 bunch celery*
1 case pretzels*

# pound(s)
*organic
I like to go on Saturdays when you can shop the warehouse (other days it is closed and you just come by and they load you up.) Occasionally they'll have produce that is not so pretty or dairy that's on it's way out for a steal...such as

SCORE!
ORGANIC BANANAS!
8.5 pounds after the kids ate all the bananas that they could over 2 days
and the 1-2 pounds that went straight to the compost heap
(wet and moldy...not good for human consumption/storage!)

The guys in the warehouse said that they weren't pretty enough to sell so they let the kids have them.  They also joked that we could only have them if we made them some banana bread...who knows they are such great people I may just do so!
They also had 3# blocks of cream cheese for $4 and some change...past date, but still good...
I was thinking cheesecake, but decided not to.
It's just not that good for me.
(but my tongue and tummy are regretting that decision.)
(No, I currently receive no compensation from them, it's just a really great company)

Saturday, December 18, 2010

Scrumptious Saturday

Winter is here.
It's in the cold brisk morning air when I bring boiling water (to defrost the waterer) and hot tap water down to the chickens in the morning.
It's in the snow that falls every day.
It's in the two hour delays that good ole hubby calls in at least once a week.
It's in the bells ringing in front of red kettles outside stores.
Yes, it is here.

And so is gingerbread.
One of my favorite winter treats.

Gingerbread Pancakes
1 c. flour (I use 1/2 all purpose and 1/2 whole wheat)
2 tsp. baking powder
2 tsp. cinnamon
1 tsp. ginger
1 Tbs. sugar

Stir together.

Mix in
1 egg
1 Tbs Molasses
1 c. milk

Heat up the griddle and oil well.  Pour on by the 1/4 cup.  When the edges get bubbly, flip it over and cook for an additional minute or so and serve...oh the toppings...syrup...powdered sugar...blueberries... Which brings me to..

Blueberry gingerbread
1/2 c. butter
1 egg
1.5 tsp ginger
1/2 tsp salt
2 tsp baking soda
1 c. blueberries
1/2 c. sugar
1/2 c. molasses
2.5 c. flour
1 tsp. cinnamon
3/4 c. milk
3 Tbs. sugar

Cream the sugar and butter.  Add in the egg and molasses.  Stir in the spices, salt, and baking soda.  Stir in the flour.  Stir in the milk.  Fold in the blueberries.  Pour into a loaf pan and sprinkle with the 3 Tbs sugar.  Bake at 350 for 50 min or so.

I have about 20 pounds of frozen wild Maine blueberries in my freezers. 
Oh how I love these treats!

Again I am sorry about the lack of pictures, but so it goes...

Let me what you cook to remind you of the Holidays.

Wednesday, December 1, 2010

Check this out!

We've put up some pages that link to recipes and educational ideas...check them out! Have a great day!

Saturday, November 13, 2010

Scrumptious Saturday

Welcome to another Scrumptious Saturday!
I have begun making a conscious decision to start using what I have...not running to the store to buy one or two ingredients for a dinner...rather plan ahead, use what I have, and have wonderful simple meals.  I also invite you the reader to make your own meal, and post the recipe in the comments (or link to your own!) and maybe a picture so nobody gets bored with the same old meals.  So here's this week's Scrumptious Saturday...

One day this week we had pork chops and potatoes with veggies.
Another day we had rice and chicken with salad.
We had leftover rice and pork chops...what's a mom to do...
Not another boring meal...after all, it is Friday night!

(Everything But the ) Kitchen Sink Fried Rice with Sweet and Sour Sauce


Fried Rice
2 cups rice...must be old precooked rice...
that way the starch has had time to make it really sticky
(great use for leftovers)
3 cups raw veggies (for crispness, I use onion, carrots, celery, and then whatever is on hand.)
2 cloves garlic minced
1 egg beaten
4 oz white meat cooked and cut into small pieces (again a great use for leftovers) OPTIONAL
ginger, salt, pepper
2-4 TBS Oil of your liking (I use peanut and olive)

Sweet and Sour Sauce
2 1/2 tsp Cornstarch
4 Tbs Sugar
5 Tbs Brown Sugar
1 C. Cold Water
1/4 C. Ketchup
1/4 tsp red pepper flakes
1 tsp Ginger
2 Tbs oil (I use peanut, but any type works)
1/4 C. Vinegar (I use white)

Chop the veggies into bite sized pieces.  Place a large skillet on the stove and put about 2-3 teaspoons of oil in it and heat it up.  Put the garlic in the pan.  Put your veggies in from firmest to ones that need to be cooked the lightest (example carrots, then celery, then onion, then spinach.)  Cook veggies lightly so they still have lots of crispness to them...it really adds to the texture of the rice. Then throw in the rice and meat.  Turn the temperature up in the pan to med-high and put in the remaining oil. After the new oil gets hot, pour the beaten egg over the mixture and stir like crazy until the rice mixture is well coated.  Then, pat the mixture down in the pan and let the oil sear the rice and make it all crispy about 3-5 min, then give it another stir and repeat the pat and sear step.  It's done depending on how much of your rice you like crispy.
Serve with the sauce...
Mix cornstarch and sugars in a small saucepan.  Whisk in COLD water.  Then add everything else in and whisk.  Bring to a boil over medium heat and boil for about 5 min.  Let it simmer until it is reduced by half...about the same amount of time it takes to make the fried rice.

I made a double batch and then froze half of it. 


For desert we made chocolate pumpkin pie...a pumpkin pie with a chocolate cookie crust and dark chocolate chips...sounds odd, but oh so good.

What did you make this week?

Thursday, November 4, 2010

The Pieman...

Okay he may not be a pie man, maybe a pie boy...but boy 'o boy does he love his pie.  
So often, I find that people do not know where their food comes from...so, I am making sure the kiddos know pie doesn't come from the store, or even a can, but from real foods.  
So here is our pumpkin pie...and an art lesson, and  a math lesson...and whatever else you want to fit into this space.
First one must have the perfect pumpkin.


Then we cut it in half and removed the seeds.  The pumpkin
went in the oven at 350 degrees.


While the pumpkin was baking, we counted the seeds and
used non-standard measurement to find out how big
our paper towels are.  We did multiple trials to demonstrate how it is not the
best method to measure in (the towel was between 15 and 16 pumpkin seeds.)

W. then drew pictures of the pumpkin seeds.


When done, we scooped all the pumpkin pulp out of the shells.
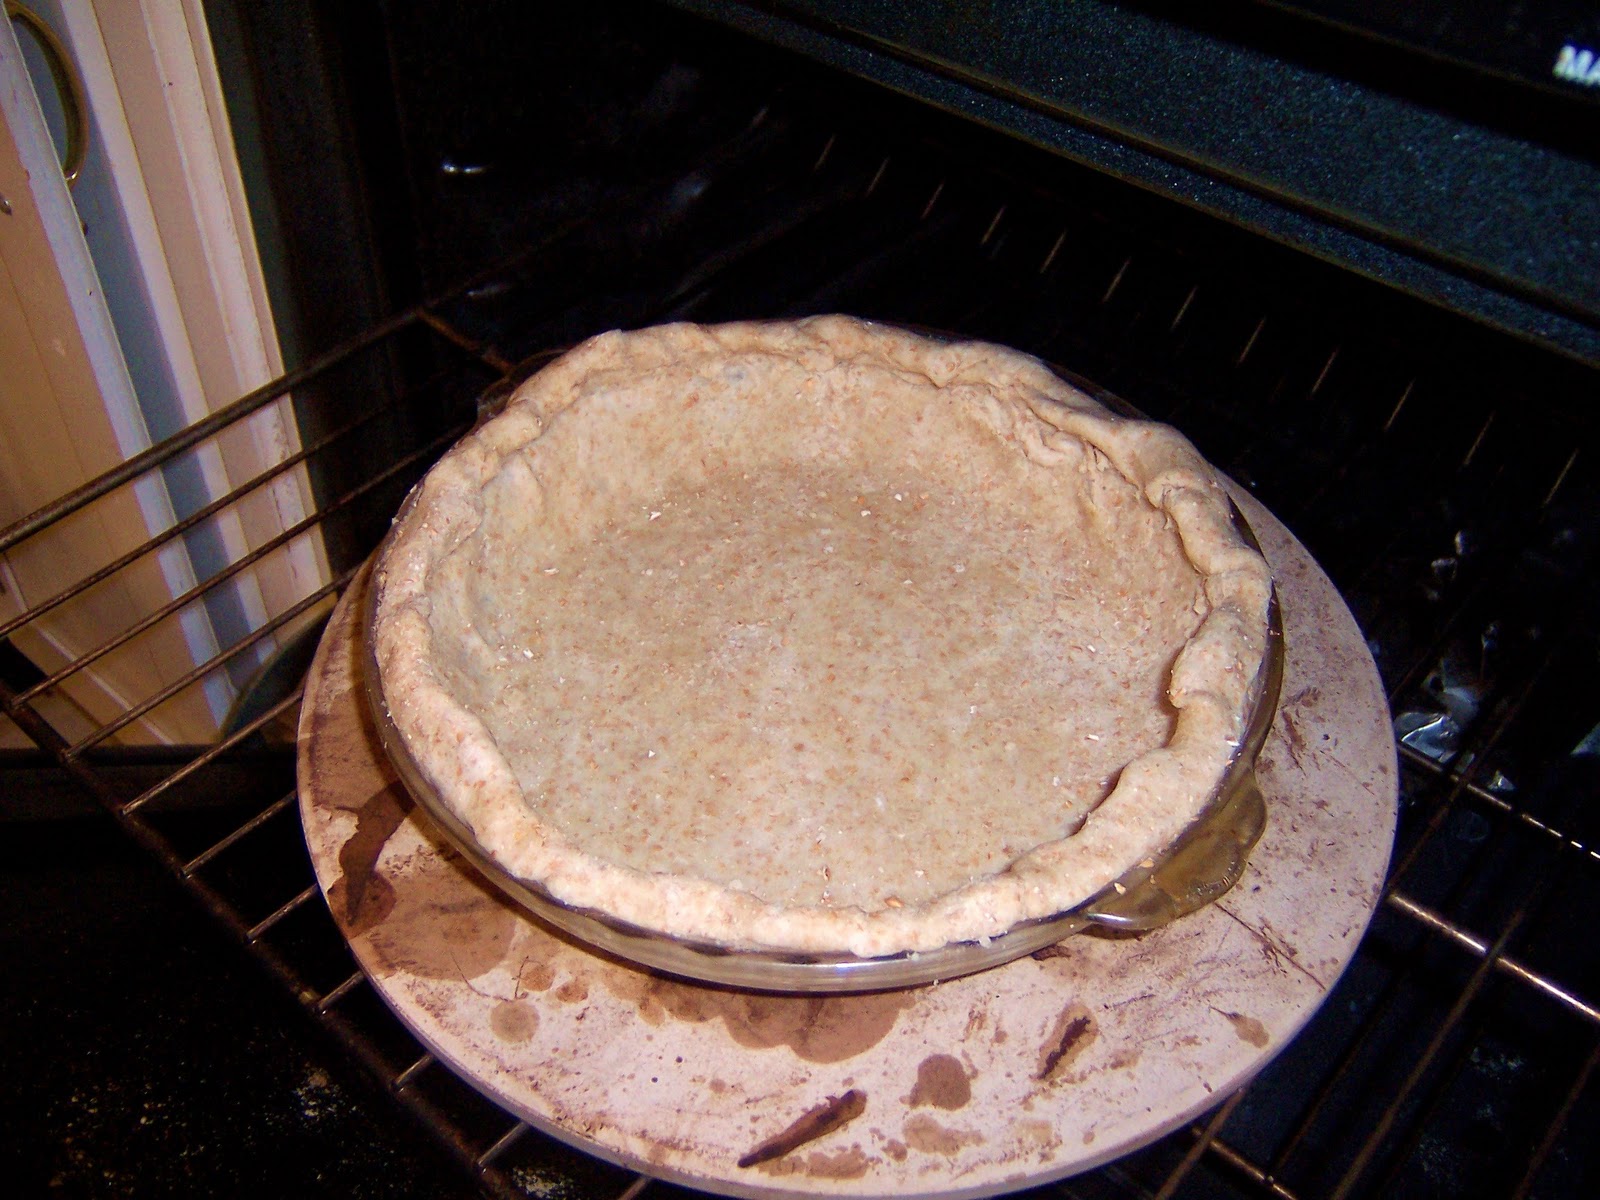
I made a simple whole wheat crust (the nutty flavor really
complements the rich pumpkin flavor.)  The trick is this:
Put the crust on the rack...then fill with pumpkin (less mess.)

We then mixed up a standard fresh pumpkin recipe (more
eggs so it gels well.) baked it...and devoured it (can it count as
a veggie for dinner?)

Saturday, October 30, 2010

Scrumptious Saturday


So my last post I decided to meal plan...
Each Saturday I will post what I made for dinner one night during the last week.
Included will be the recipe as well as some pictures.
You can link to what you made, and I will have the hubby peruse your recipes/pictures/etc and decide what will be added to the meal plan for the next month (YOU WIN...the joy and satisfaction you made a great meal.) And if it is super great, I may even write about your wonderful meal as I made it (and share with the world how great your meal was!)

You can peruse as well and maybe you'll find something that you like...That way with meal planning, we'll never get bored!
Without further ado...here's my first Scrumptious Saturday!

GREEK PIZZA

Friday night is glorious...
We are home together with a chance to reconnect after a week of work, school, and other busy activities.
So what brings a family together better than pizza.

Crust
makes about 4 servings
1 Tbs. Yeast
2 tsp. honey
1 tsp each dried oregano, garlic powder, basil and sea salt
1/4 tsp ginger (helps make the dough rise quicker)
2 tsp olive oil+ oil to coat the bowl
1c warm water.
1 3/4 c. flour (any mixture of white and wheat flours)
Corn Meal (about 1/4 c.)

My yeast, herbs and salt mixture
Put the yeast and herbs in a large bowl.  Add in the water, oil, and honey.  Let sit a moment, then add the flour slowly.  Once it creates a ball, turn it out onto a floured surface and knead until smooth and elastic.  Oil the bowl and place the dough back into the bowl (roll around to coat the ball so it doesn't dry out.)
Cover with a dishtowel and let sit in a warm location for about 15 min.

Turn up the oven to around 450 degrees.  If you have a pizza stone preheat it and place a pan of water below it.

All ready to go in the oven!
Sprinkle corn meal onto the back of a cookie sheet/pizza peel (so the rim of the cookie sheet faces down to make sliding the pizza off possible)

Pat out dough into a circle (we make personal sized pizzas so everyone can choose what the want on it and get the kiddos involved.)

Top with whatever catches you fancy.


Yummy!

I made Greek(ish) pizza
(Old Mother Hubbard did not have olives)
Tomato Sauce
Feta
Onion
Tomatoes
Mozzarella
Spinach
Oregano

I had my doubts, but I had everything on hand.  It would have been better with some olives, but they were not available, and I'm not going out to get an item...as per my writing on Thursday.  I was pretty pleased with the nutrition of it...grain (check), protein (check), veggies (check), delicious (check), kiddos devouring it... (CHECK!)

Thursday, October 28, 2010

Old Mother Hubbard...

Yes, it's that time of the month...when the food budget is gone and we are "inventive" mode aka...simple, use what you got mode. I will admit to overspending this month to buy milk and medication (sinus infections, bronchitis and ticks got us this month.) But here are some pictures of what we have:


Whole Wheat and White Flour with
Vinegar


Canned Applesauce and Tomatoes with
homemade granola, raisins, beer, spritzer,
and wine

Pear Butter, Dried tomatoes and Peppers,
Dried herbs and lemons, Dilly Beans and jellies


Eggs


Green Tomatoes

Rice, pasta, beans, quinoa, one can tuna,
and a can of Pumpkin.  I think I see some
marinades and PB as well.

So here are some of my meal ideas...

Breakfasts:
Yogurt and Granola (not too inventive, but it's something that not everyone in the house typically will choose from their free will...) Fruit????
Pear Butter Muffins
Toast and Eggs (need to make bread) I think we may have some frozen berries to go with it!
Lunches: 
Peanut butter and raisins on apple slices, Milk
Peanut Butter and Jelly (again with the bread I should make...) Applesauce on the side
Dinner:
Pasta with tomato sauce
Beef Veggie soup
MEAT (1/4 of a cow is in the freezer) maybe with some spiced up pumpkin and dilly beans

When I started writing this, I could hardly think of something to make tomorrow, but now that I took pictures, took stock, and thought about it, we have lots of things to nourish our family.  It just is back to basics.
We are so fortunate for what we have. We have the ability to be picky. We have the ability to choose what we want to eat. It takes moments like this to realize how truly blessed we are. 
I am almost embarrassed to publish this with my original thinking that the cupboards are bare, when there are people out there who do not have the makings of one balanced meal. 
I bet we could go another 1-2 weeks on what is here.
I'm also thankful I have a food order to be picked up on Saturday (then I can really get cooking!)
I think I also need to start monthly meal planning.  That would make us that much more efficient.
Then I could share with all of you the family meal plans, and maybe you could share with me as well?
What do you think...
What are you cooking...
If you have your own blog, put a link to what you're cooking, or leave a comment...
Or not...your choice.